What is Wonderflex though? Its what is referred to as a heat activated composite material or thermoplastic sheet, a material that when heated up you can shape and form and as it cools it holds that shape and can be reheated many times to get the effect/shape you want. There are many other similar materials that can be used alongside wonderflex such as Fosshape and friendly plastic.
Wonderflex comes in sheets in a variety of sizes, one side of it is smooth, the other has a grid of fibres, be aware of this when making what ever you are making if you're only going to have one side on show and depending on what effect you want, check which side is face up, otherwise you could spend a long time trying to get a smooth surface as other people have found out.
Wonderflex comes in sheets in a variety of sizes, one side of it is smooth, the other has a grid of fibres, be aware of this when making what ever you are making if you're only going to have one side on show and depending on what effect you want, check which side is face up, otherwise you could spend a long time trying to get a smooth surface as other people have found out.
Thanks to Wonderflexworld.com I was able to try out wonderflex for the first time, with my Aion Cosplay well under way and not sure what to make parts out of, when this came to my door unsolvable parts, suddenly became solvable! The collar, Buckles, Cuffs and other smaller details that just didn't seem right being made out of foam. So after doing some research further on the material I set out on my way to start using wonderflex for the first time. Unlike others who had used a heat gun I didn't have this option open to me, so I used hot water from a kettle, which worked just as well, even if i did make a bit of a watery mess in the kitchen the first time around.
So here are some of my before during and after images of one of the buckles and the collar:
Wonderflex in all its glory just after opening the package. Its easy to draw on with pencil, and cut out with scissors or a craft knife.
the Buckle all made up, I made a slight mistake when making this but it was easy solvable, I sandwiched foam in between my Wonderflex layers to make it a bit more sturdier and give it a bit more bulk, the middle part is half of a small capsule ball from those vending machines.
The first layer of paint I used normal silver poster paint for this, it worked perfectly fine although it took sometime to dry, but I think that was just me painting it too thickly.
Second layer of paint, some black acrylic painted detail and its also been varnished with clear furniture varnish to finish it off and seal the paint. the capsule has also been painted with acrylic, rivet details were added too before varnishing made form some iron on studs.
The start of the collar, this is the back section, I spray painted it first for an even black coat before hand painting on the details. There are a few parts to this too, for the details, its a shame you cant see how its formed from this angle I was really chuffed with the forming of this piece when it was finished.
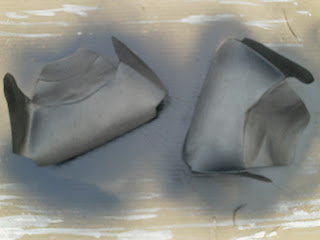
Using a bottle filled with cold water it was easy to form these shoulder collar pieces, and I cannot wait to finish painting them too. the same technique will be used as the other collar part. it took a bit longer to do these parts however looking at it, they are a rather complicated shape.


1 comment:
Enjoyed your blog and photos about our WONDERFLEX.
www.wonderflexworld.com
Post a Comment